This article will help you set-up a tracking system to monitor the traffic and sales on your minisite or widget using Google Analytics. You will be able to see the number of visitors, the sections most viewed, the source of your traffic and conversions.
You must have a Google Analytics account or create one to enable the tracking.
1. Retrieving the Tracking ID From Google Analytics
If you don’t have a property yet, follow the instructions to create a new one from the Admin menu. If you already have a property for your website and you add your ticketing as a module, please use the same property for both website and module.
In the property’s address, please enter:
- Your website’s address if you sell mostly through a module added to your website
- Your minisite address if your mostly sell through your Weezevent minisite
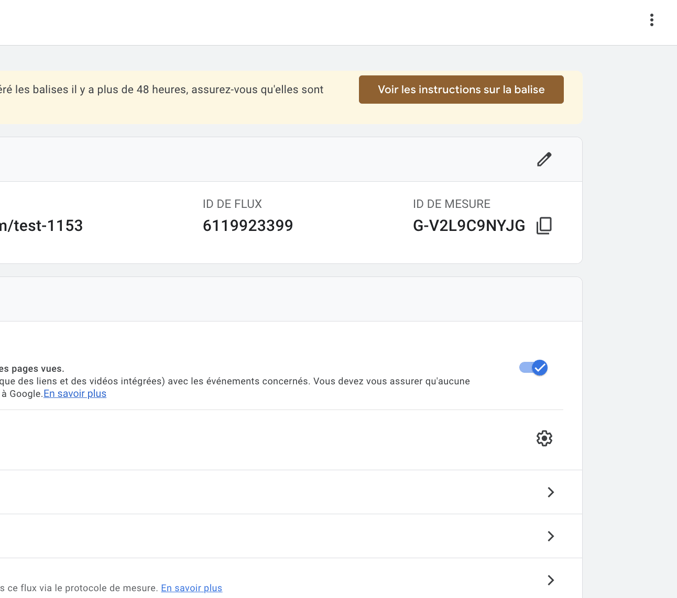
Once your property is ready, go to Tracking data in the admin menu and copy the Tracking ID displayed (in the following format: UA-XXXXXX-X).
2. Adding the Tracking ID to Weezevent
Log into your Weezevent account, click on the event you need and go to the menu Communicate > Referencing and Exposure

Add the tracking code retrieved at Step 1 in the section Tracking codes > Google Analytics and Save.
Important: If you use Google Tag Manager, please do not add any Universal Analytics tag in your Tag Manager because this data would be reported twice. All the features described on this page (tracking from your website to module, advanced e-commerce, progression tracking in the module, etc.) are only available by using your Google Analytics tracking code directly, and will not work if you integrate it via Tag Manager
3. Tracking Your Stats in Google Analytics
From there, your basic tracking is in place and you can view your number of visitors and their origin.
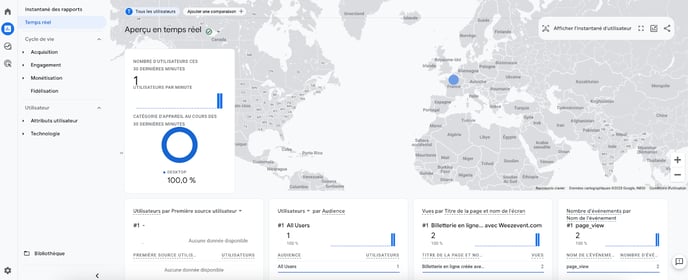
You can check that the data displays correctly using the Real time section. It can take a few hours to have the full reports.
When a visitor reaches your website, Google Analytics creates a new session in which the visitor’s origin is recorded. Any subsequent page view and action will be linked to that session. The module’s integration code tracks the visits between your website and the Weezevent module. These conditions must be met for it to work:
- You have entered a Google Analytics tracking ID in your Weezevent interface (integration is not executed via Google Tag Manager)
- Your website and sales module both use the same tracking ID
- Your website’s Google Analytics integration is compatible with Universal Analytics (the integration code loads the analytics.js or gtag.js file but not ga.js)
- You have used Weezevent module’s standard code (integration starts with <a... and not <iframe...)
4. E-commerce Tracking
To assess the value of visits, you can enable the e-commerce option. In Google Analytics, go to the Admin section, select the view you have created, then go to the e-commerce settings and activate this option.
At the following step, you can activate the advanced e-commerce reports option:
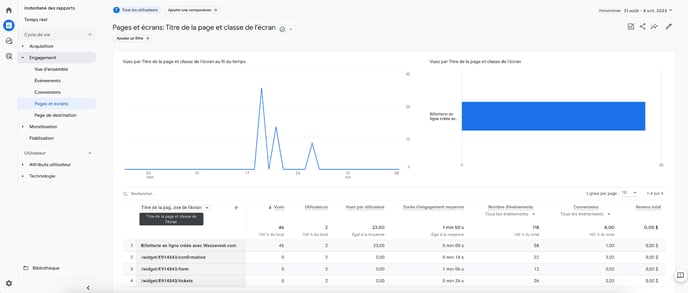
By activating this option, you can view detailed stats about your ticket types in the section Conversion > e-commerce.

You can also define e-commerce as a basis of calculation for the conversion rate on various indicators. To do this, select e-commerce in the Conversion menu at the top of the reports
Thus, when you go to Acquisition > Overview for instance, the report will include the proportion of visitors who purchased a ticket, filtered by origin.
5. Advanced: Analyse Behaviour in Your Sales Funnel
In order to track the customer journey in the sales funnel, the start of each step will generate a view page in Google Analytics in the following format:
/event/EVENT_ID/STEP
EVENT_ID is the ID of the event being purchased, which you can find on the bottom left of your Weezevent interface.
STEP is the step where the visitor is and record the following data:
- dates (choice of session if the session mode is enabled)
- tickets (choice of ticket type)
- form (answers entered)
- payment (payment data entered)
- confirmation (confirmation displayed)
For example: /event/344532/form
This page does not actually exist on your website. If you follow the link from Google Analytics, you will surely encounter an error page. This is ok, and will not be seen by your visitors. This address is only used for the purpose of reporting.