Is your event repeated on different days? Do you organise tours, shows, plays or any other multi-date event? Follow our guide to enable the session mode. This feature allows you to set up, in a few clicks, the online ticketing of the different sessions of your event.
Session mode does not allow the buyer to add several sessions or dates for the same session to his shopping cart. The customer can only add a single session to their order. However, he or she can choose how many people will attend the session
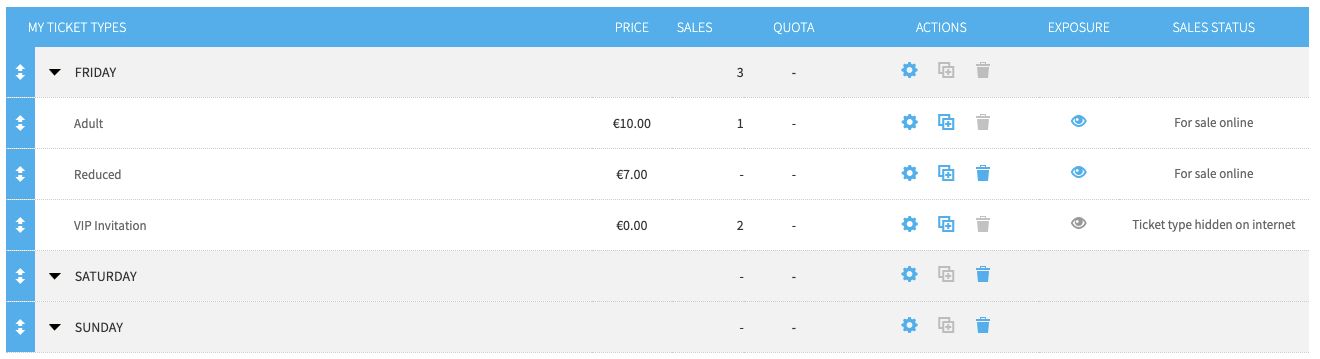
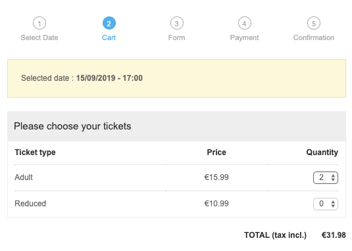
If your event lasts only a few days and is not frequently repeated, we recommend you create categories within your ticket types, as in the example below, instead of enabling session mode
1. Enabling session mode
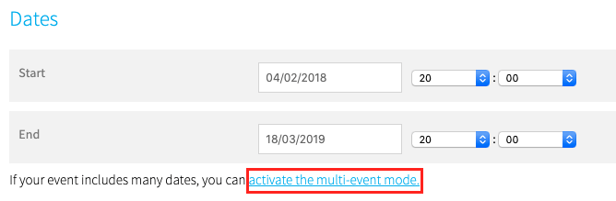
Go to Configure > Event Details. In the Dates section, click on "Activate the multi-event mode" and confirm.
2. Session settings
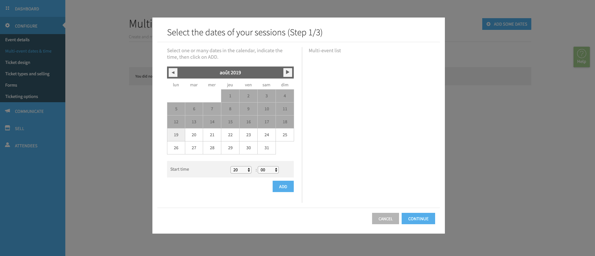
Once the mode is enabled, all settings are set-up from the menu Configure > Multi-event dates & times. Click on "Add some dates" then select one or more dates in the calendar:
Tip: If your event occurs twice a day, for example once at 5pm and again at 8pm, create your sessions in two steps, per hour of performance. Select all dates for the sessions played at 5pm and then repeat that step for the sessions played at 8pm.
Then select the prices available for sale on the sessions to be created: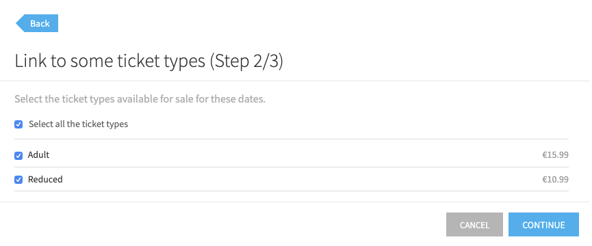
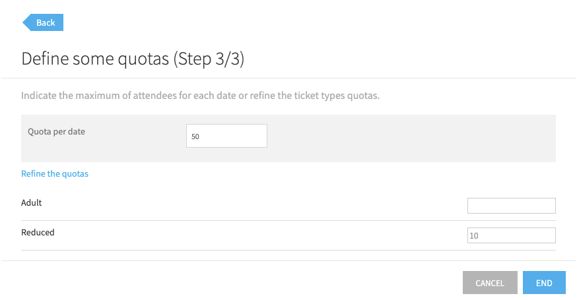
Finally, define the quota of the sessions to be created. It is possible to refine them by price if necessary:
3. Date and time management
Once the sessions are created, you can change several elements from the Action for the selected dates drop-down menu. It allows you to: manage the ticket types, manage quotas, adjust VAT rates, modify schedules, activate, deactivate or delete the selected date.s.
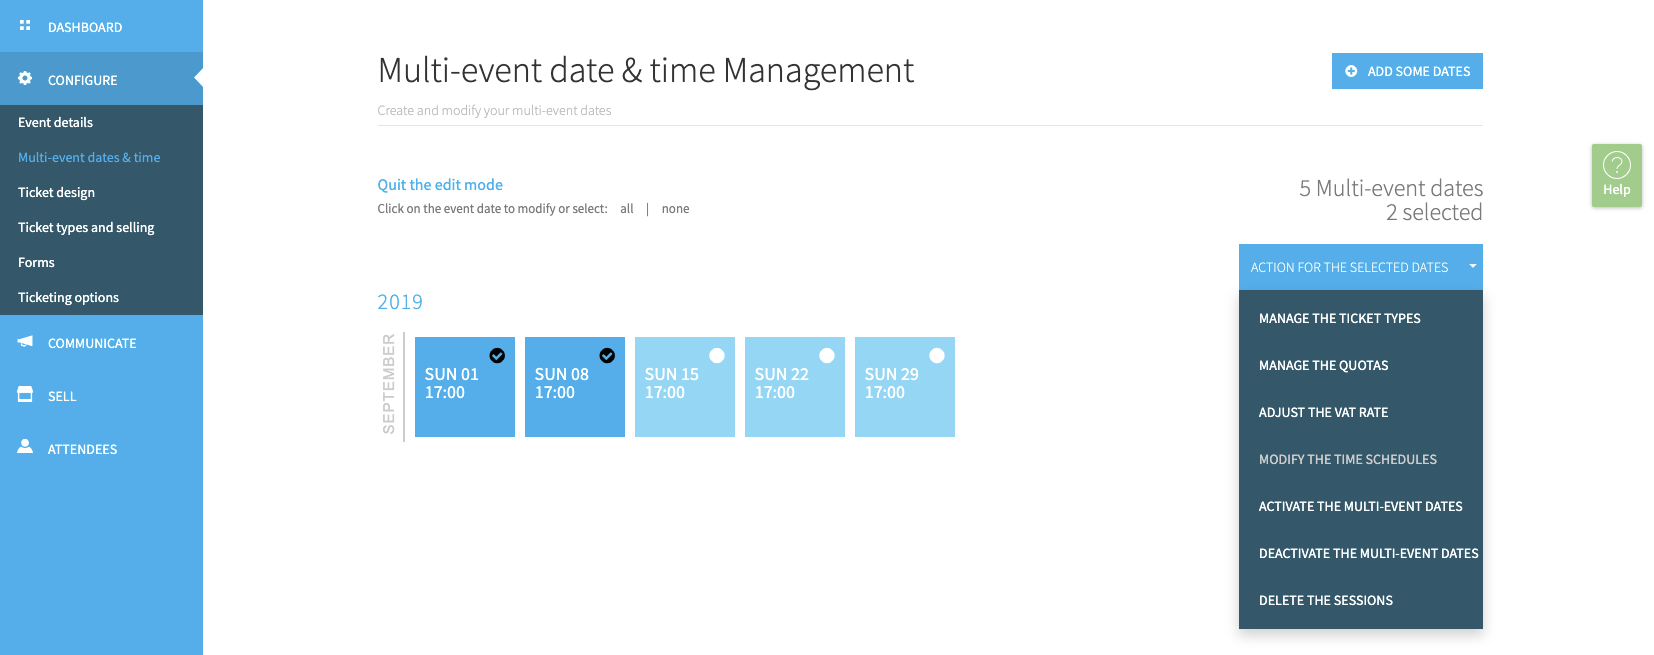
To edit all sessions at once, click Edit multi-event date & time > All. To edit all sessions from the same month, click on the relevant month. To edit only one session, click on its date. In the example above, we selected two out of five sessions to perform the same action.
Important: Once tickets have been sold, some actions such as changing dates or cancelling sessions are no longer possible unless the tickets sold have been cancelled
Tip: You can filter by session in the attendee management section (Attendees > Manage attendees) to access information you need about the buyer or attendee faster.
4. On the buyer side
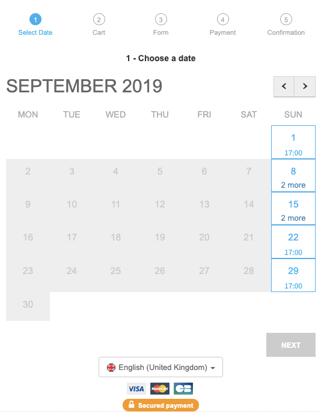
For the buyer, the first step in ordering is to select the date of their choice from a calendar:
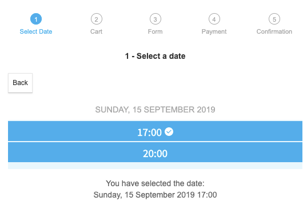
If there are several sessions on the same day, the buyer then chooses the desired time:
The buyer then makes a choice among the available price(s) for the selected session and indicates the number of tickets they would like to purchase:
The last steps are to fill in the form and pay online.
5. Disable session mode
As long as no sales have taken place, you can deactivate the session mode. To do this, simply return to the "Dates" section of the Configure > Event Details menu.